Theme Customizer
The HeroMe theme is constructed on FSE technology. FSE enables the editing of your site’s entire structure and layout, including headers, navigation menus, sidebars, footers, etc., utilizing the Gutenberg editor.
FSE WordPress represents a more flexible and potent approach to website creation, allowing users to easily customize their web pages and enhance user experience without specialized programming skills.
Get to know all FSE’s features:
Theme Customizer
To utilize the theme, it is necessary to configure your website beforehand. To do so, please navigate to the section Appearance > Customize and customize Site Title, Tagline and Favicon. These settings are responsible for identifying your website.

Site Title
If you haven’t uploaded a logo and have selected the option “Use site title as logo,” the text entered in this field will be displayed as the header instead of a logo. Furthermore, this text will be used as the website title displayed on the tab of your browser.
Tagline
By default, the slogan is used if no logo image is selected and the option “Use site title as logo” is enabled.
Favicon
The site icon (favicon) is utilized as the icon for your website in browsers and applications. Icons should be square and have a minimum width and height of 512 pixels.
Gutenberg blocks Site title and Tagline
You can utilize the standard Gutenberg blocks, namely the Site Title and Site Tagline blocks, when creating your own template.

Logotype
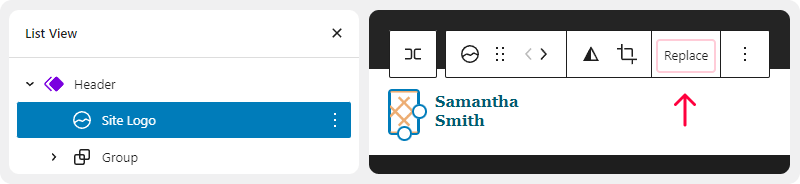
You can modify the logo by accessing the following section: Template Part, then go to WP Dashboard > Appearance > Editor > Template Parts > Header.

Click on the Site Logo block and proceed to replace the image by clicking on the “Replace” button.
Styles
This guide illustrates how to use styles to ensure a cohesive design throughout your website. Styles allow you to adjust various colors, typography settings, and layout parameters.
Find the Styles Settings
While editing your site, find the Styles option in the upper right corner of the screen. The icon looks like a circle with one white and one black half, as shown in the image on the right.
The full steps to locate the Styles panel are:
- Visit your site’s Dashboard.
- Go to Appearance → Editor.
- Choose a template and begin editing it.
- Select Styles from the right-side menu.

In the Styles settings, you will see the following options:
- Browse styles
- Typography
- Colors
- Layout
- Blocks
Each of these options are explained in the following sections of this guide.
Browse styles
Customize the appearance of specific blocks for the whole site by choosing browse style in component panel of the template. In there you will able to choose a variation of your site appearance on one click. At the present time we provide you light (default) and dark mode for styles.

Typography
Use the Typography settings to manage the appearance of the text used throughout your site.
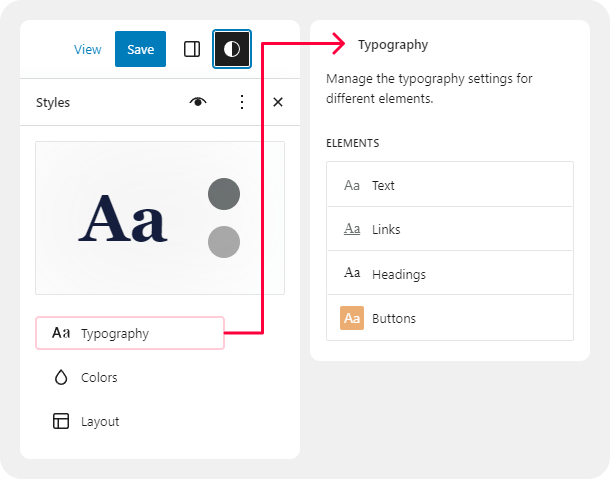
You can adjust settings separately for
- Text
- Links
- Headings
- Captions
- Buttons
The options found in Typography include:
- Font allows you to select a font family to apply to the text.
- Size allows you to set the size of the font. You can choose from a set of default font sizes or set a custom size in REM, PX, or EM using the slider button above the size selections.
- Appearance changes the text’s weight (from thin to extra bold) and inclination (regular or italic).
- Line height sets the spacing above and below the text. (If you select zero, be sure to check your site on mobile.)
For more, visit our dedicated guide to Typography settings.
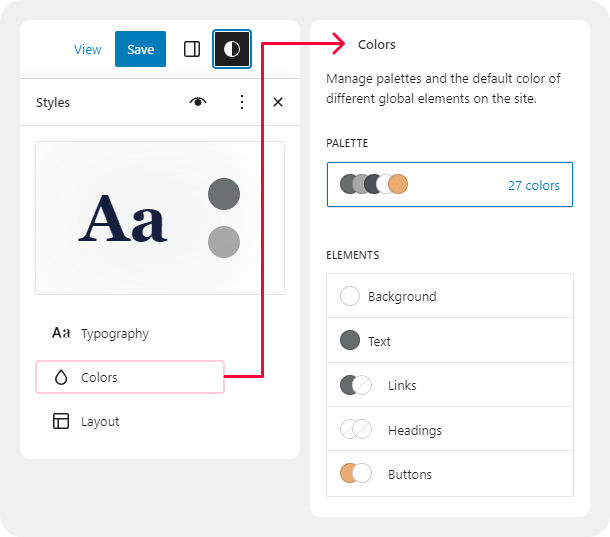
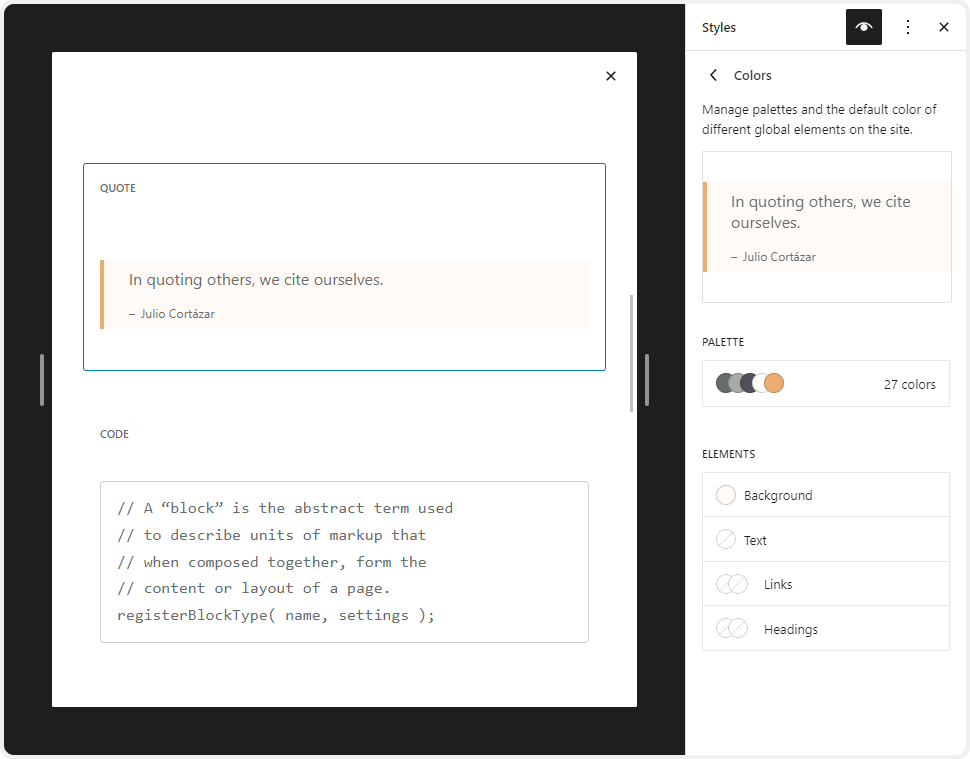
Colors
- Open Styles settings
- Select Colors.
- Select Palette to choose your site’s default colors or choose from the following elements on your site:
- Background
- Text
- Link
- Heading
- Buttons
You can find more information on working with colors in the article “Change Your Site’s Colors Using Styles“.
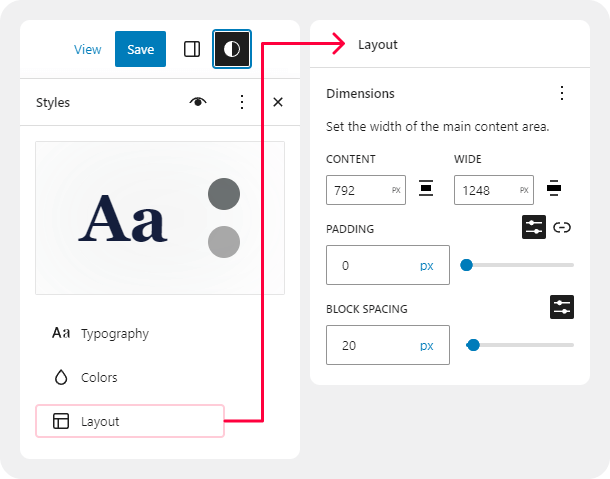
Layout
Use the Layout settings to control the width of your site’s content area, add padding, and adjust the spacing between blocks.
For more, visit dedicated guide to Dimensions settings.
Blocks
In the Styles panel, click on Blocks to customize the appearance of specific blocks across your entire site.
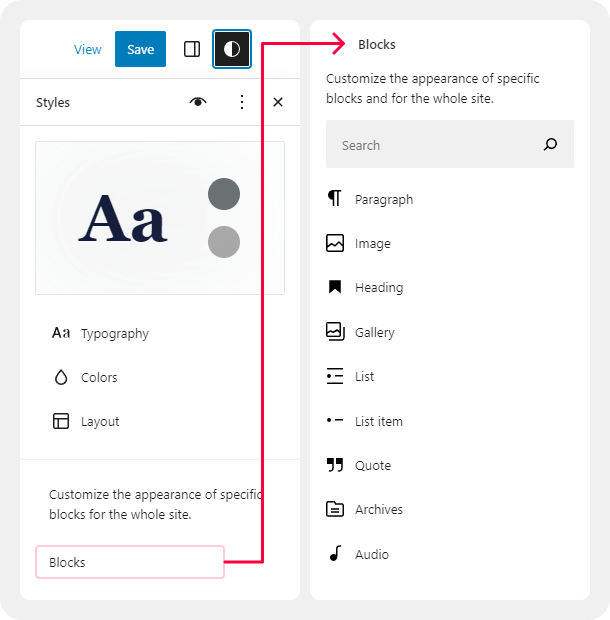
Here, you will see a list of all the blocks you can customize at a site-wide level. Choose a block to see the available options for that block.
The changes you make to blocks using Styles will affect every block of that type that you have added to your site, unless you have customized a block individually. For example, if you added a Buttons block to your Contact page and set it to have a yellow background, your change in Styles won’t override that yellow color. However, if you inserted the Buttons block on your Contact page and did not change the color from the default, it will change to the color you set here in Styles.