Settings
In order to change settings for your appointments, on the WordPress Admin Panel you need to navigate Timecheck > Settings.
Time settings
This settings includes four time settings of appointments:
- Appointment time range
- Appointment session duration
- The latest available date for appointment
- Last minute appointment protection
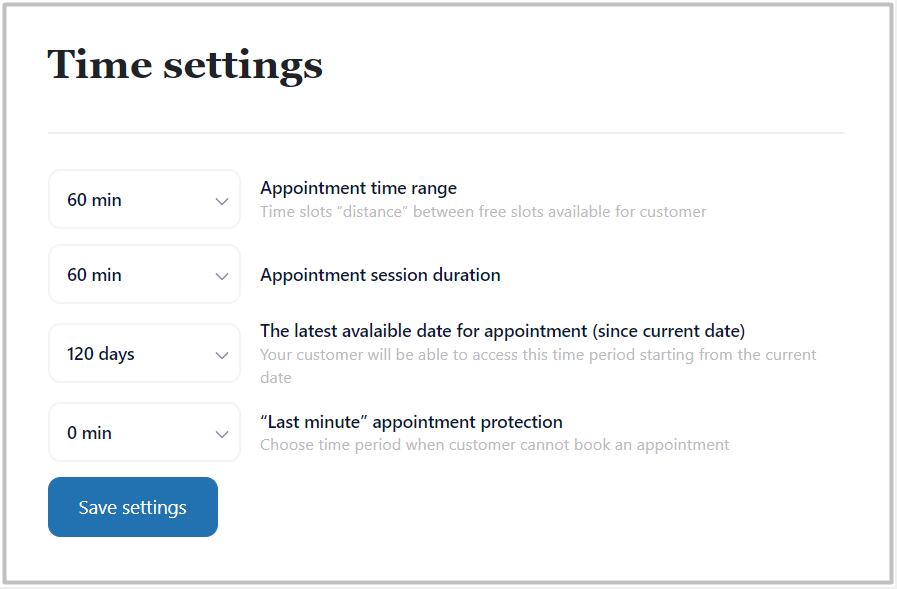
Appointment time range
This setting allows you to edit length for the time slot step, it determines the time slot step in which your appointments can be scheduled.
For example, if you select 20 minutes as the default time slot step, then the working hours will be divided by 20 minutes of timeslots. So appointments can be booked at 9:00, 9:20, 9:40, 10:00, etc (booking after every 20 mins gap).
Appointment session duration
Using this setting, customers can book appointments for services during the default time slot.
As an example, if you select 60 minutes for the time slot step, then the new appointment you are adding will have a default time duration of 60 minutes.
The latest available date for appointment
This option allows you to set time period of you working time since current date. For example: If you set 120 days, it means that customers can book from current date till 120 days ahead of current date.
Last minute appointment protection
Whatever your working time duration will be, working hours will be started according to this settings. it means that if you set 60 minutes your customer will not be able to book appointment within one hours from now and it will protect your first hour from booking.
The results of your settings, you can see on the “Schedule Preview” calender table on the right of the settings.

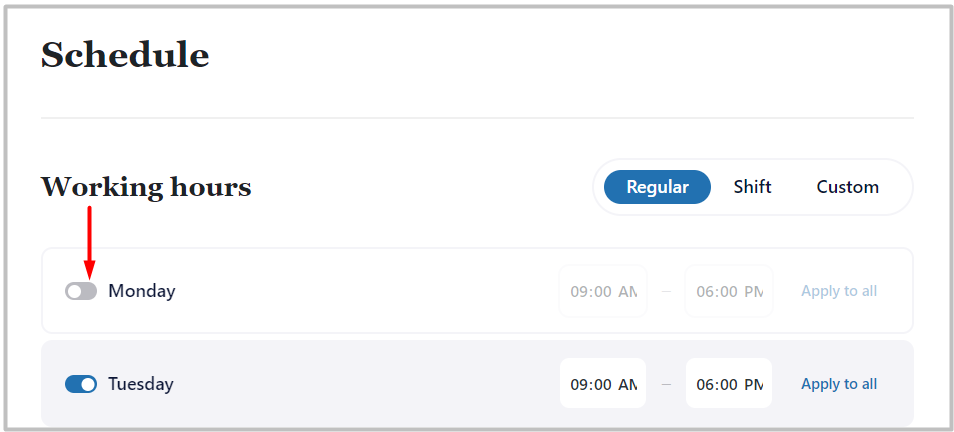
Working Hours Settings
Here you can see all settings related to Working hours options (Schedule). There are three types of working hours: Regulare, Shift and Custom.

Here you can set general working hours and break hours day-wise. You can set the start and end time of working hours from Monday to Sunday. On the day you are not working, just set it OFF by using toggle button.
For the break hours, you can set multiple breaks having a start time and end time. To Add break, click on the “Add” button. It will add new card with start time and end time, with toggler to switch of the break setting.

Once you can set the timings, hit the “Save schedule” button. You will be able to see added breaks under the specific day.
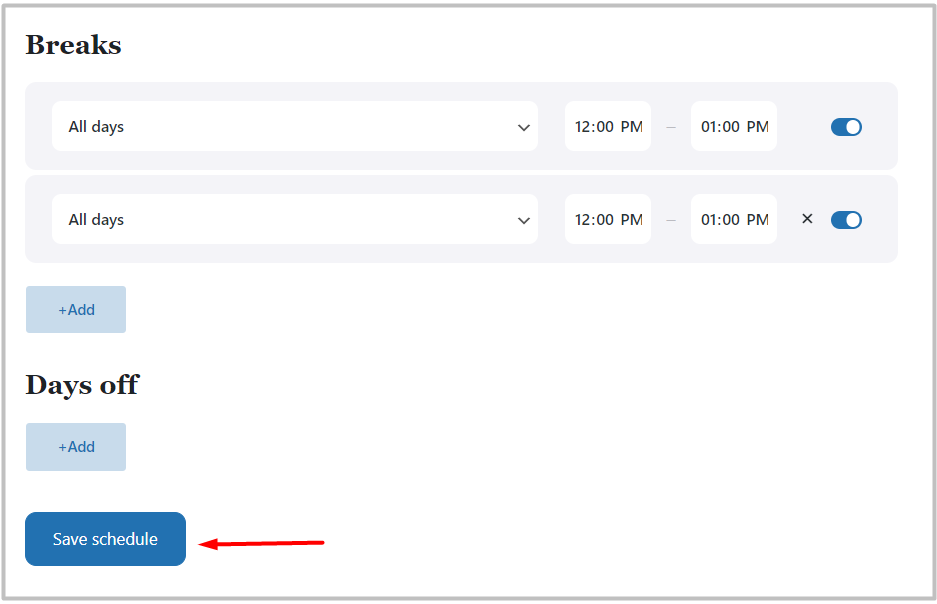
To edit the break hours, click on the break start time and end time inputs and enter break hours as your wish. To delete the break hours, just click on the X icon near break timings and it will delete break hour card.
Shift settings
This setting will allow you to set shift working hours. Here as you can see “Shift work” 1 across 3, it mean you will work 1 day and 3 days off starting with date established below. You can set working time period as well.

Custom settings
Here you ckicking on custom button, you can set custom working hours. In this settings you will find calendar where you can choose working days for one month. All chosen days will be working days with time period set. You wil able to set different time period for each your working day.

Days off (holidays)
You can set the days off (holidays) when you’re on holiday. To add day off, click on “Add” button under the title of “Days Off” in Schedule Settings.

When you click on “Add” button to set a holiday or day off, a calender will be opened. Add the holiday by clicking on the day which you want to set as a day off. Once you have done the settings, click on the “Save schedule” button and it will be set as a holiday or day off (Red in color).
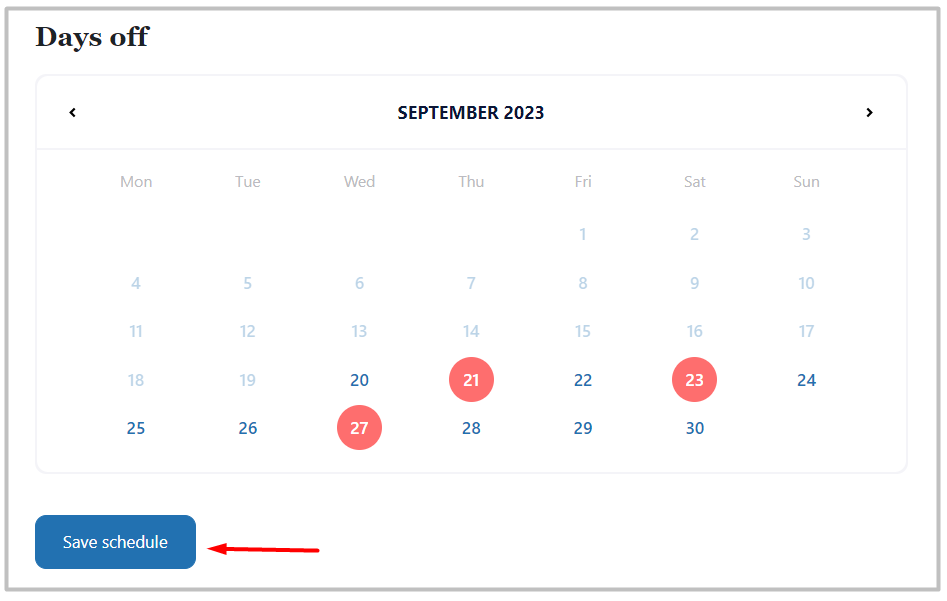
If you want to edit or delete day offs, click on the existing calender and find month or date of day off and click on it, red circle must disapear, it means you have deleted day off from your calender and working hours settings.
Email settings
You can send any email notification that you want to send based on the “Email Settings”. You can write and edit any Email from the “Text Editor”.

1. Appointment Received/Pending
This email notification will be sent immediately to your customer after an appointment is booked from the front end, or a new appointment is created from the back end.
2. Appointment Approved/Confirmed
This email notification will be sent immediately to your customer after an appointment is approved or confirmed by the admin, or a new appointment is created from the back end, and if the default status of the appointment is “Confirmed”.
3. On Appointment Rejection/Cancellation
This email notification will be sent to your customer when an appointment is rejected or canceled by the admin from the back-end.
4. On Appointment Reschedule/Changed
This email notification will be sent to your customer when an appointment is rescheduled or changed by the admin.
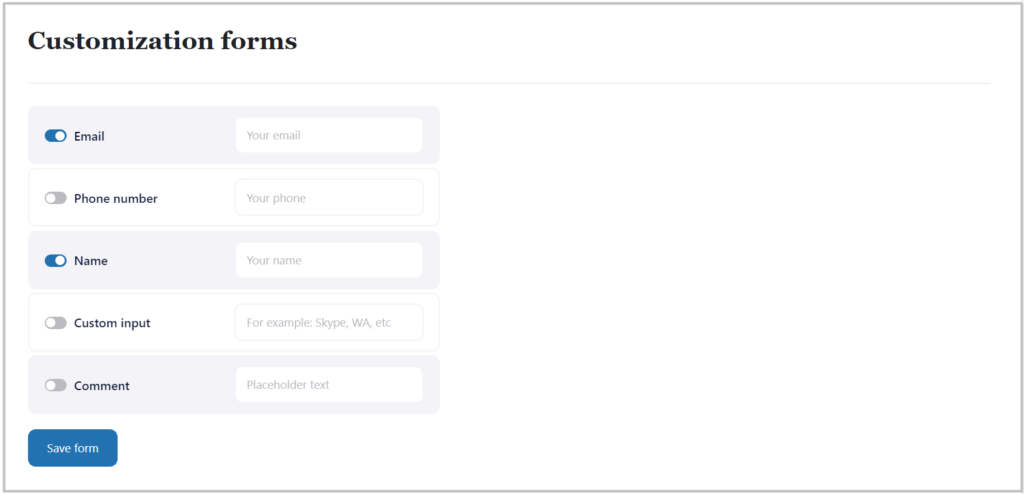
Customazation forms
From here you will get many options to enable/disable form fields according to the requirement, the options are as follows:
- Hide / Show Email field
- Hide / Show Phone number
- Hide / Show Name
- Hide / Show Custom Input
- Hide / Show Comment field
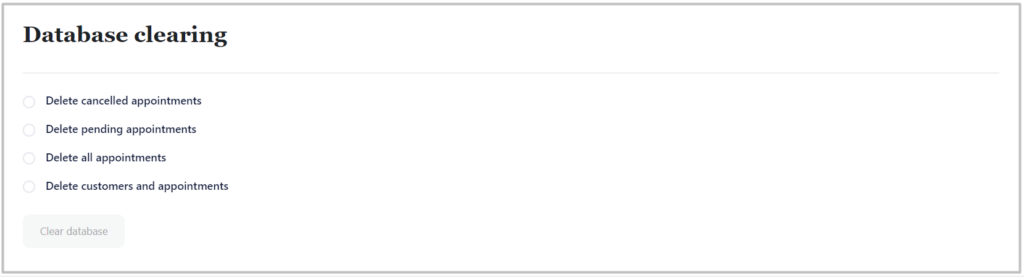
Database clearing
For your convinience we have setings to clear your database from unwanted data. In order to clear data, choose one of the availbale clearance options:
- Delete cancelled appointments
- Delete pending appointments
- Delete all appointments
- Delete customers appointments
Once you have chosen the data to be deleted, click “Clear Database” button and Timecheck clear the database the unwanted data.