Customers
In this short guide, we will show you how to manage customers through the back end in Wordpress Dashboard. When you add a new customer from the back-end, or when a new customer books an appointment through the front-end of the website, they will automatically be added to the customers list.
List Customers
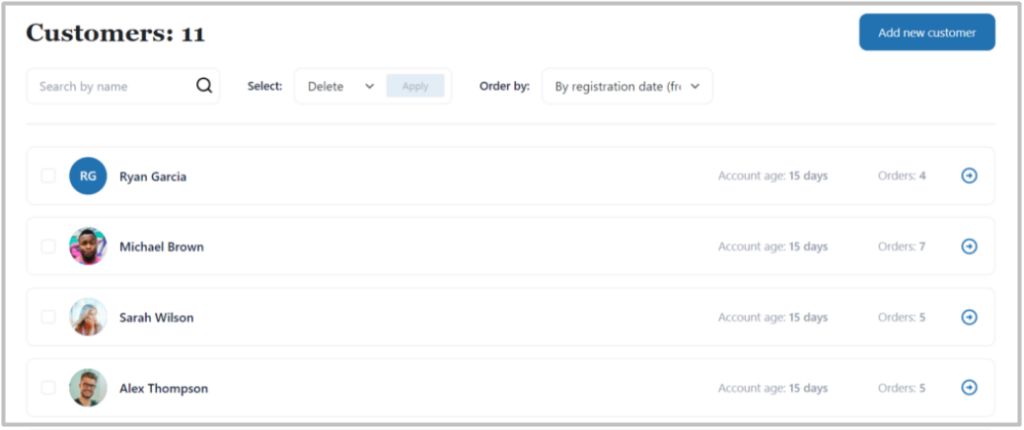
To list customers, you need to navigate to Timecheck > Customers in WordPress Dashboard.

On this page, you will be able to see all the necessary information about customers. With the search bar, you can filter customers by customer name and order your clients using filters “Order by”. Using filters you will be able to see the ucstomers ordered by:
- Registration date (old to new)
- Registration date (new to old)
- Appointments number
- Alphabetical order (from A to Z or from Z to A)
Add/Edit Customers
To create a new customer from the back-end, click on the “Add New” button from the top right corner of the page

and it will open the page with all the necessary details for the customer like Avatar, Name, Email address, Phone number, Custom field, and Description.

To edit an existing customer, just click on client name or right arrow button on the right side of the customer’s list card and it will display new page for editting customers information.

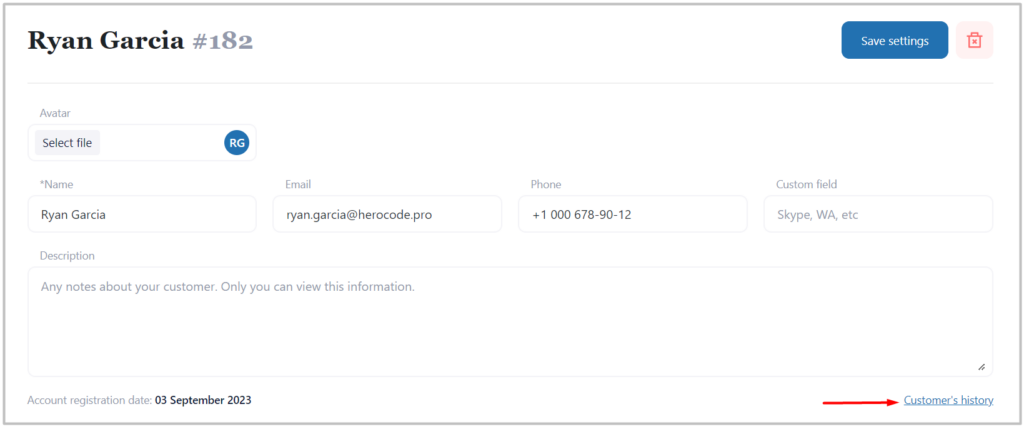
In the “Edit Customer” page you have options to change customers’ Avatar, Name, Email address, Phone number, etc fields.
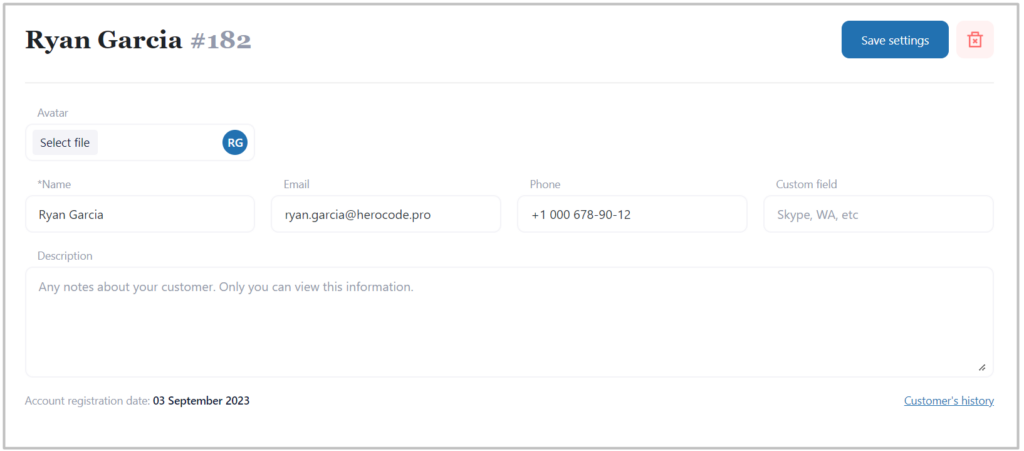
Here, you can find additional information about customers appointments in the below of the above “Edit Form” and navigate that specific appointment and here you can cancel or confirm pending appointments.

So, once you are done with all the changes, hit the “Save settings” button to add or update the customer details.

Delete Customer
To delete a specific customer, you can do it inside customer’s information editting page. On the right of the corner you will be able to find a “Delete” icon.
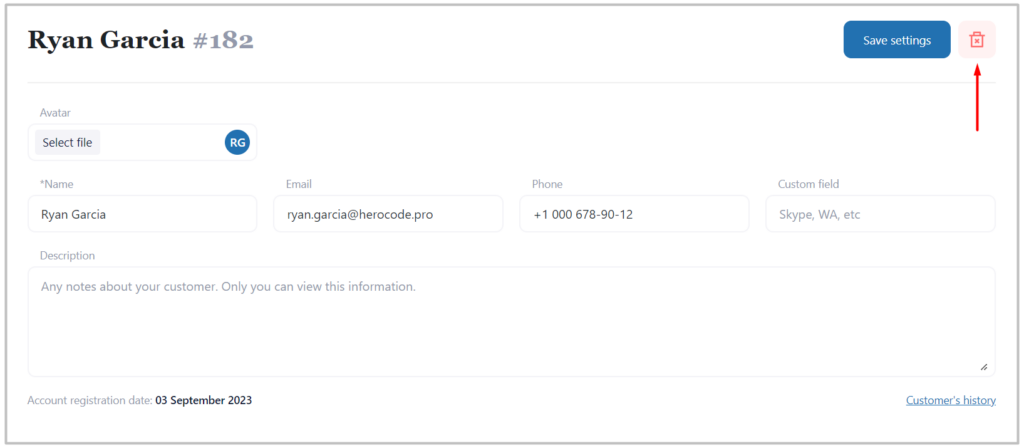
Click on that icon and it will ask for the confirmation to delete. Click on the “Delete” button from the confirmation box and it will delete that customer right away.
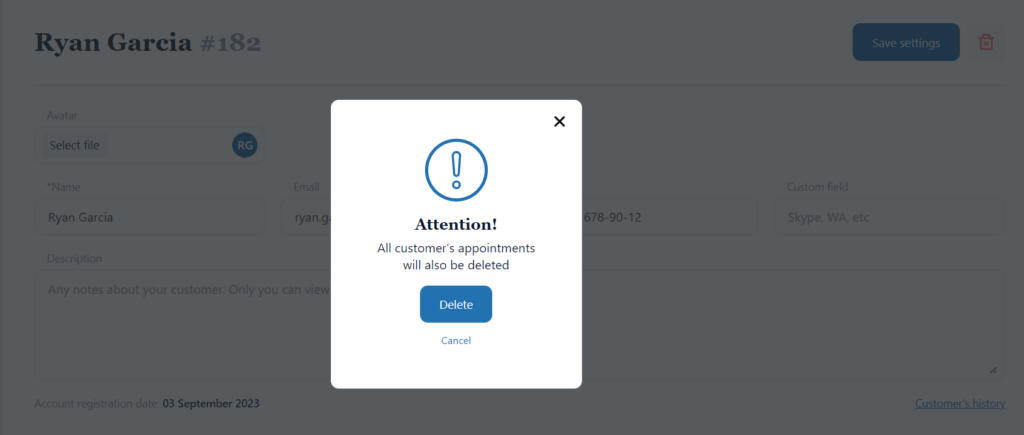
Please note that, if you delete the customer, the system will delete his booked appointments. So, please double-check before deleting the customer.
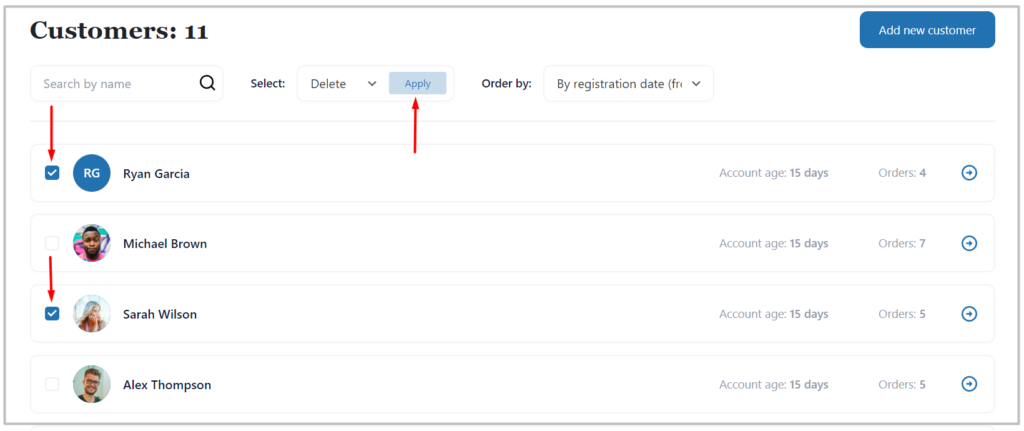
Another way to delete your customer or customers, you can use bulk deletion on the Customer’s List Page. Click the checkboxes on the left side of the customers avatar to select customers to be deleted on the Customers List page and click “Aply” button the header part of the page.
Customer’s history
You can see your customer history on the specific page for that. In order to see your customer’s history you need to click in “Customer’s history” link below the customers “Editting page”.
You customer’s history page will look like this:

