Getting started
Timecheck is Wordpress Plugin which allows you to manage your working time, track your customers, and catalog them. Plugin is suitable for small business owners. It allows you to receive, keep and schedule your customers appointments.
Timecheck Plugin currently includes the following Gutenberg blocks:
- Timecheck Inline
- Timecheck Step by Step
- Timecheck Collapse
Manage your time effectively with:
- Comfortable online appointment booking
- Patients database with all necessary info
- Easy working time schedule customization
- Pre-customized email notifications for your patients. They will get emails about appointments automatically
- Easy notes about your patients
- Easy-to-use and user-friendly admin panel
Installing Plugin
You need to follow very simple steps for getting started with Timecheck.
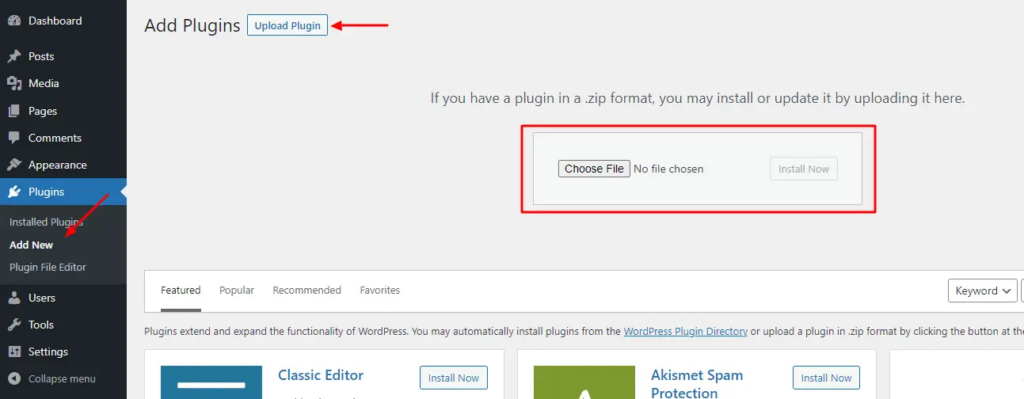
- Now to install the plugin via WordPress Uploader: In your WordPress admin, go to
Plugins > Add New > Uploadand upload the available ZIP of Timecheck to install the Plugin. - Manual Installation :
- Download the latest version of the Timecheck plugin.
- Unzip the downloaded file to your computer.
- Upload the Timecheck directory after unzipping the plugin to the
/wp-content/plugins/directory of your site. - Activate the plugin from the ‘Plugins’ menu in WordPress.
Updating plugin
Important: Whether you update Timecheck manually or automatically, we recommend you backup your website data before making any updates. Read more about WordPress backups here.
There are two ways to update the plugin:
1. Auto Update:
- In your WordPress admin, go to
Plugins > Installed Pluginsto update Timecheck Plugin directly from an available update link for Timecheck.
2. Manual Update Using WordPress Installer:
- Download the latest version of the Timecheck from the website from where you have purchased or contact support team in https://herocode.pro website.
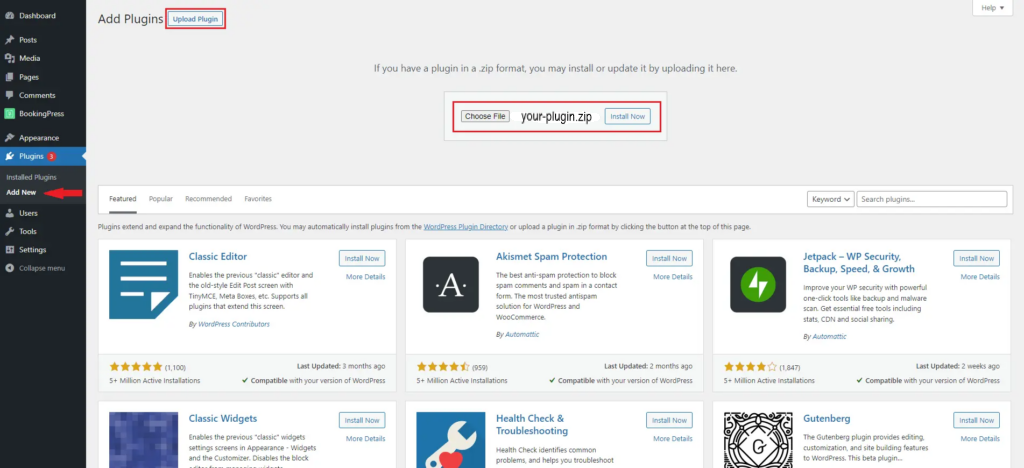
- Now to update the plugin via WordPress Uploader: In your WordPress admin, go to
Plugins > Add New > Uploadand upload the available ZIP of Timecheck and click on the Install button.
3. Manual Update via FTP:
- Download the latest version of the Timecheck from source.
- Unzip the downloaded file to your computer.
- Upload the new plugin source code Timecheck directory after unzipping the plugin to the /wp-content/plugins/ directory of your site.
- Refresh the Timecheck admin pages to confirm the update.
Quick Start Guide
Starting to work with the TimeCheck is easy. All you need to add Gutenberg block on the booking page and you can start using booking forms.