Gutenberg blocks
Timecheck step by step
Timecheck plugin collects client applications across all devices and displays them step-by-step.
1 step
This step requires the customer to choose a date for their appointment. To proceed, the customer must click the “Next” button once the date of the appointment has been decided.

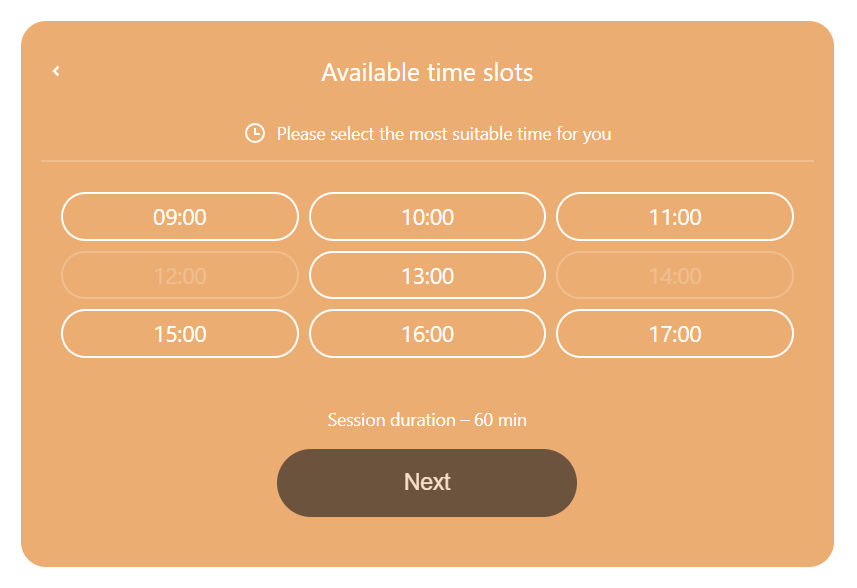
2 step
This step requires the customer to pick the appropriate time for his/her appointment. Upon choosing an appointment time, the customer can proceed by clicking “Next”.
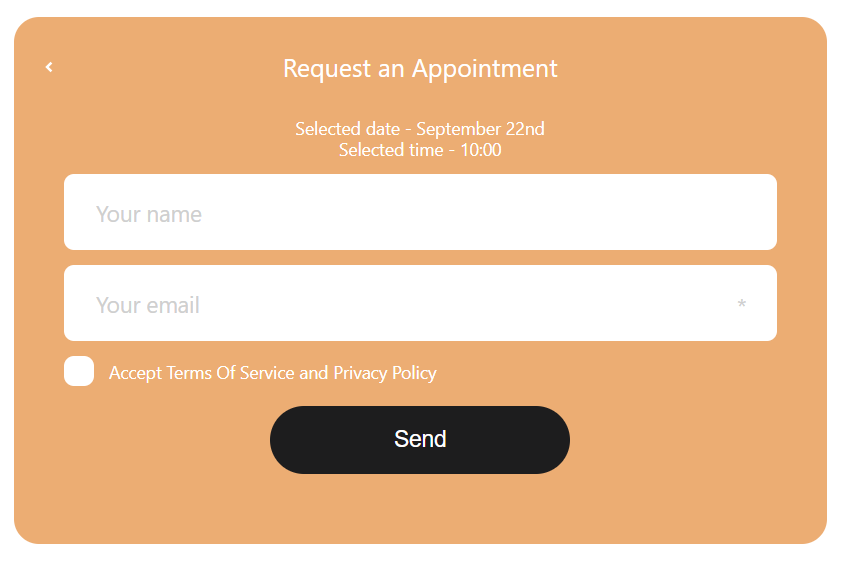
3 step
This step requires the customer to fill required form fields for his/her appointment. Once customer done with this step, he/she has to click “Send” button to submit the appointment details.
To add/edit form fields, navigate in WordPress Admin Panel Timecheck->Settings->Customazation Forms.
Timecheck collapse
Collecting client applications with a Collapse display view across all devices. The applications are captured by the Timecheck plugin.
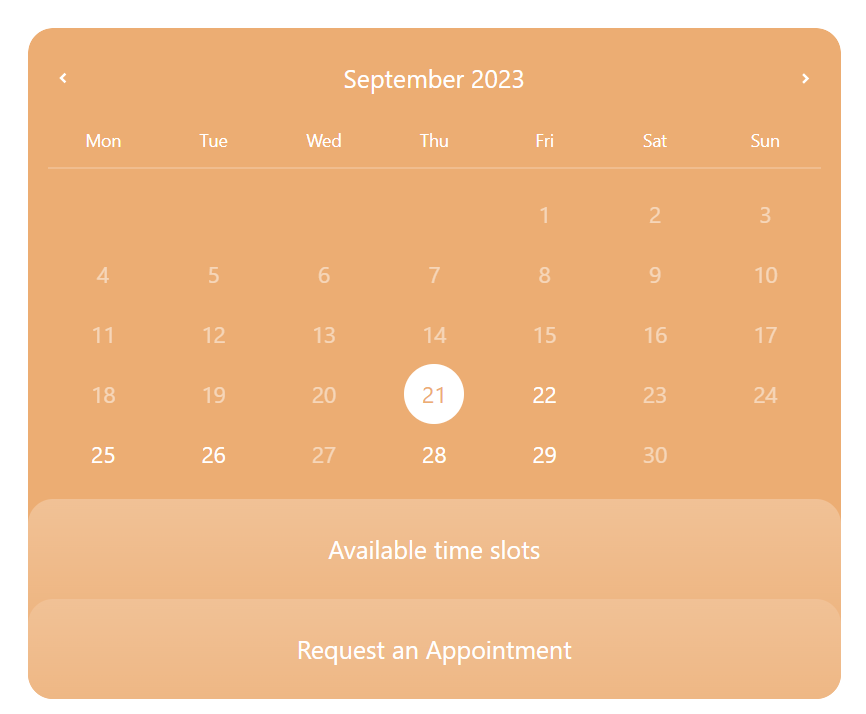
1. First collapse
On this collapse customer needs to pick the appointment booking date. Once customer decided the date of appointment, he/she has to click “Available time slots” button to go next collapse.
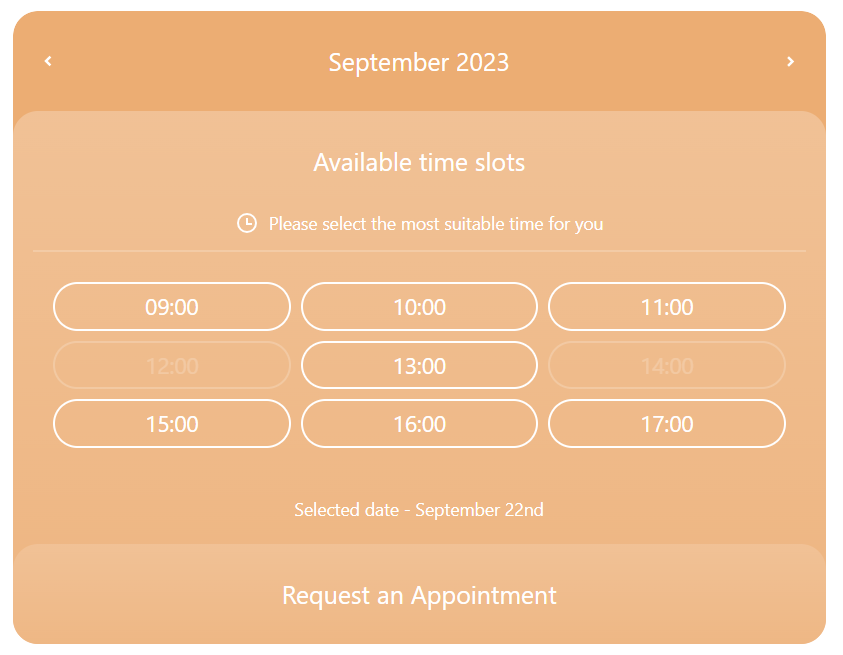
2. Second collapse
On this collapse customer needs to pick the appropriate time for his/her appointment. Once customer decided the time of appointment, he/she has to click “Request an Appointment” button to go next collapse.
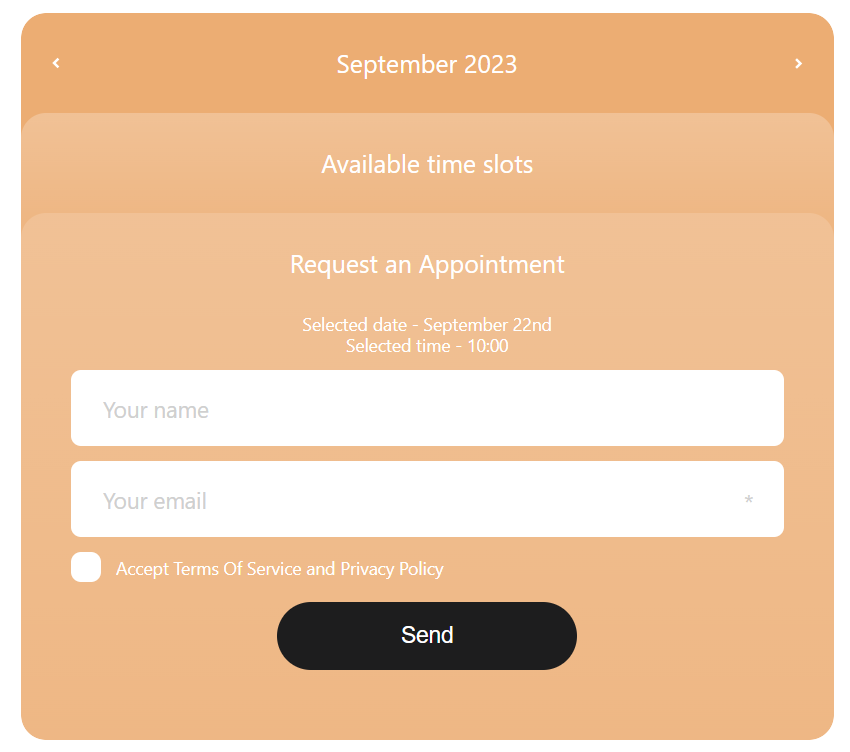
3. Third collapse
On this collapse customer needs to fill required form fields for his/her appointment. Once customer done with this collapse, he/she has to click “Send” button to submit the appointment details.
To add/edit form fields, navigate in WordPress Admin Panel Timecheck->Settings->Customazation Forms.
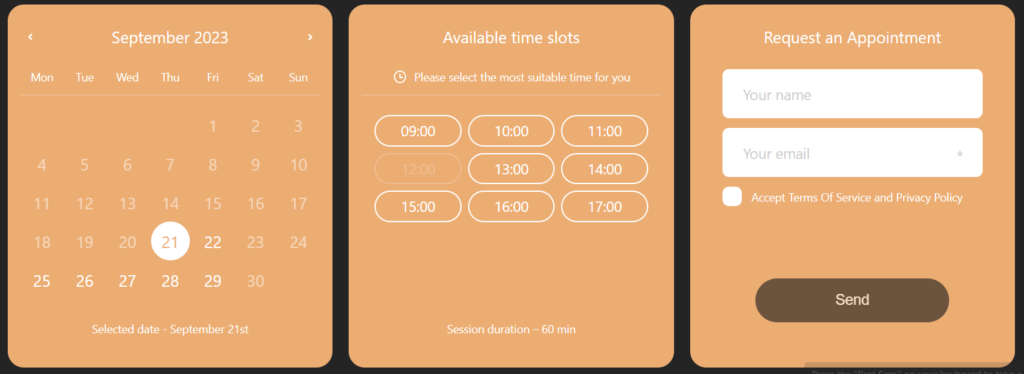
Timecheck inline
Collecting client applications with a horizontal display view on desktop and Collapse view on other devices. Collapse function will be displayed if the parent container’s width is insufficient. The applications are captured by the Timecheck plugin.