Appointments
A full list of scheduled appointments features can be found on this page.
Calendar view
The Appointments page is a user-friendly scheduler, it shows all the scheduled appointments in a calendar view. There are three available types of calendar pre-views:
- Month
- Week
- Day
You can view the appointment details by clicking on the “appointments” within the appointment block in order to quickly view all the appointment details.
A blue color indicates that the appointment has been approved, a gray color indicates that the appointment is pending, and a gray color indicates that the appointment has been canceled.
Alternatively, you can edit an appointment from the calendar by clicking on the appointment.
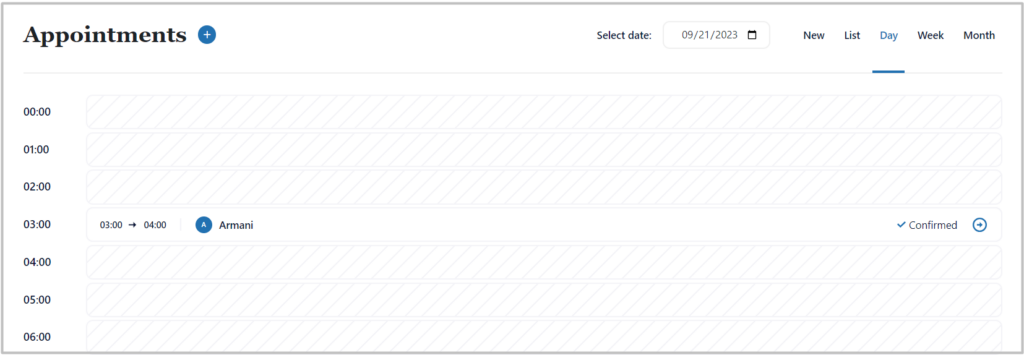
Day view:
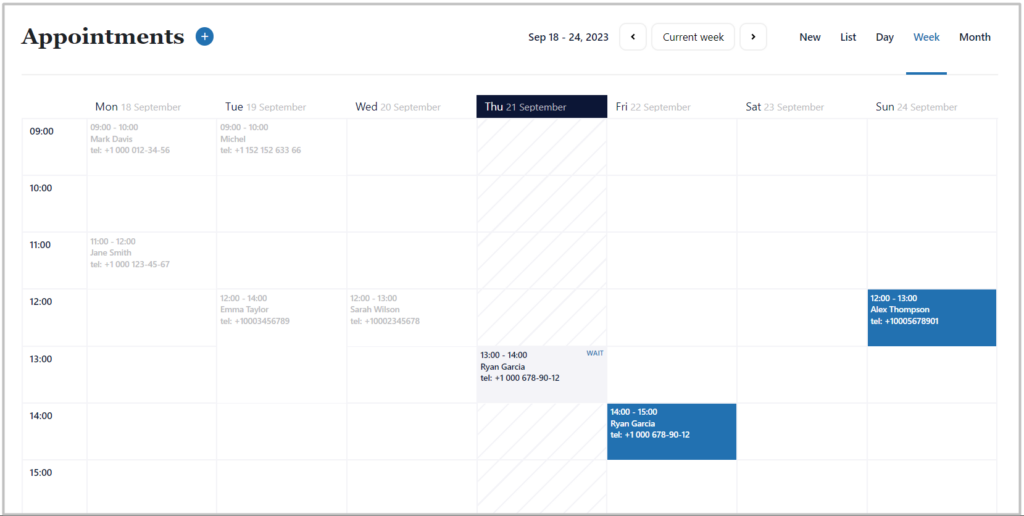
Week view:
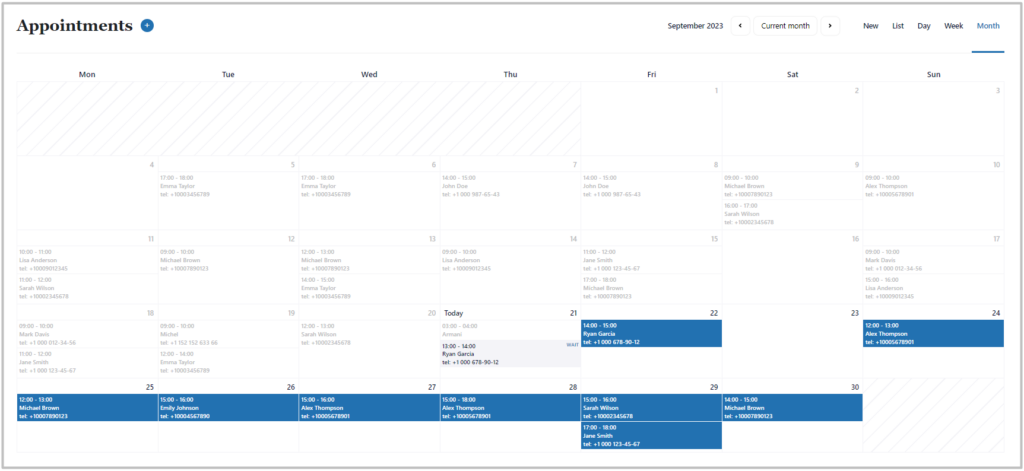
Month view:
List Appointments
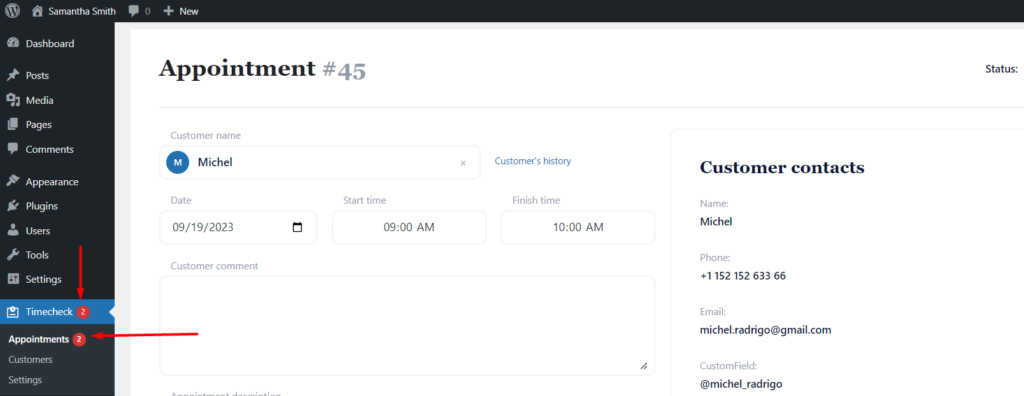
To see list of appoitnments, navigate to TimeCheck > Appointments in WordPress Admin Dashboard.

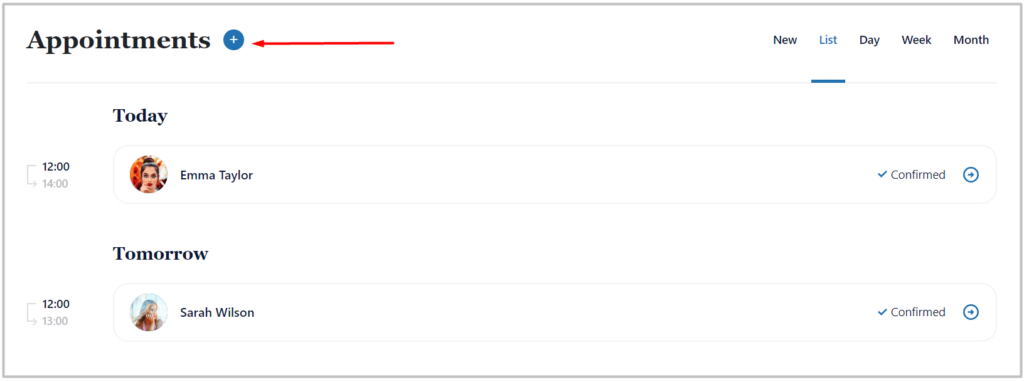
On this page, you will be able to see all the necessary information about scheduled appointments as a list by default. It shows by default the appointments for the last three days, but if you want to see more you can click on the “Load More” button below the list.

You can change the individual appointments’ status by clicking the appropriate status from the right side of customers list displayed for each appointment.
You can also view the details about the Appointment by just clicking on the specific appointment or clicking on the right arrow icon on the right side of the customer appointment list.

.
Filter Appointments
You can also filter appointments by setting the date range you require in “Day”, “Week”, “Month” tabs, selecting from the available tabs at the top of the page.
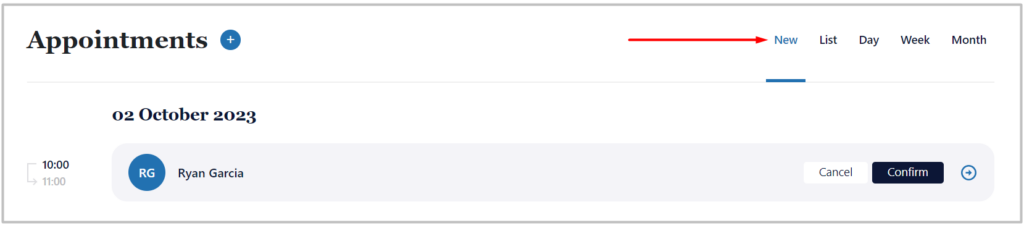
New appointments
In the appointments page, click on “New” to see all newly added appointments. From here you can view the appointment’s details and change the appointment’s status.
Dayly view of appointments
Appointments divided into time ranges within a day are displayed on a daily view page. You can use drag-and-drop functionality to change the appointed time within a day.

In the day view of appointments, you can find an add appointment button to “add a new appointment” within that time range.

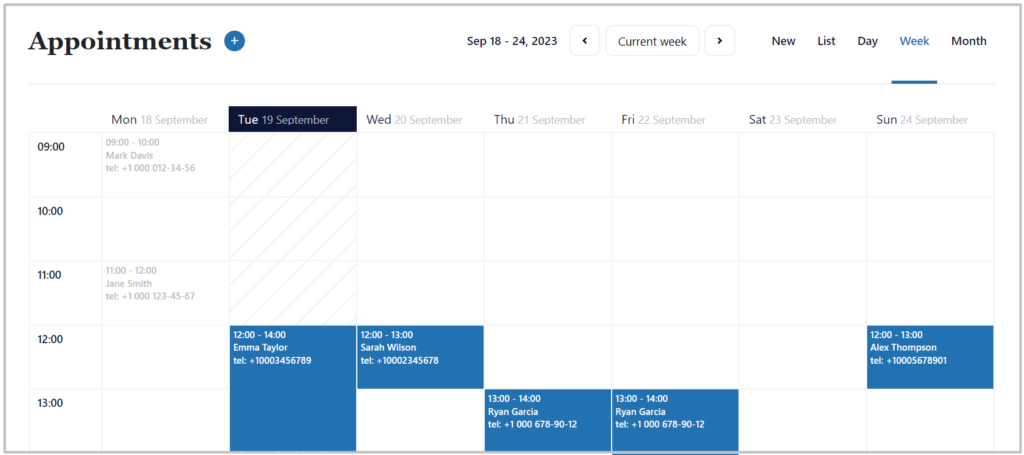
Weekly view of appointments
You can manage all your appointments within a week by clicking on the “Week” tab. For convenience, the week view page also contains tabs or navigations to move to previous or following weeks.
Monthly view of appointments
can find all appointments which are past or for coming period of time. There are options to navigate to see other months appointments by clicking on left and right arrows on the top of the page.

Add Appointment
To schedule a new appointment from the back-end, click on the “Add New” button from the top left corner of the page and it will open a page with all the necessary details for the appointment.
Choosing “Customer” from the dropdown will allow you to book an appointment and then selecting the start time and end time for your appointment. You can also add an appointment description (if any).
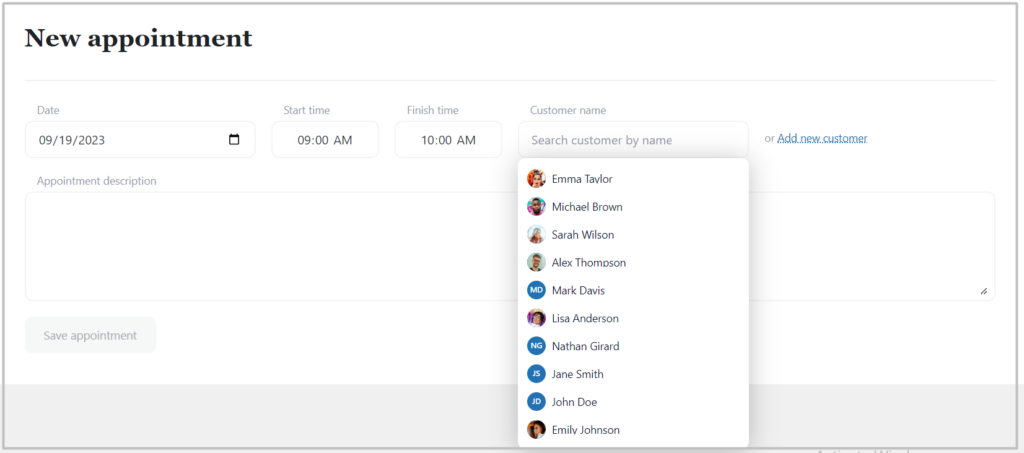
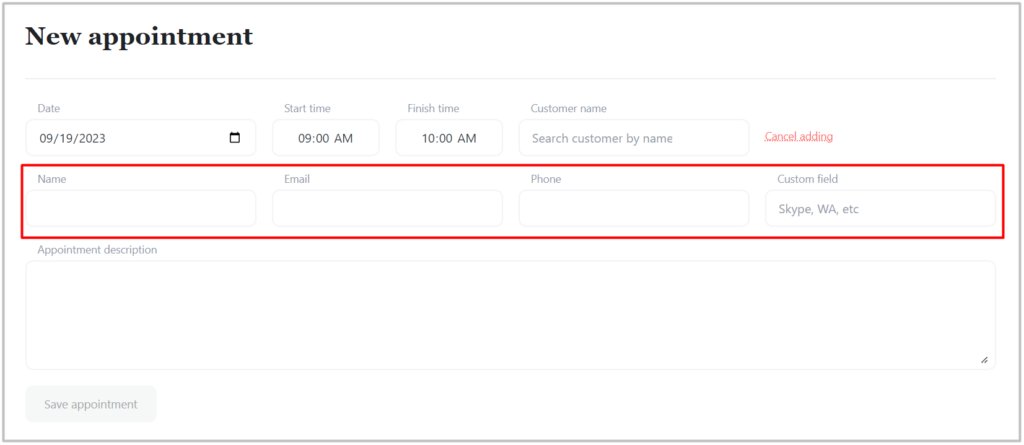
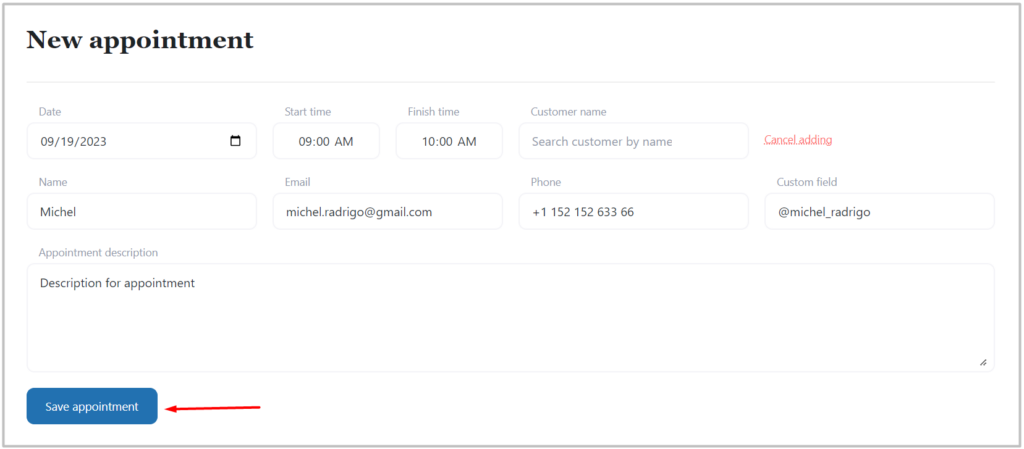
Adding a new customer to your appointment can be done by clicking on the “Add new customer” button.
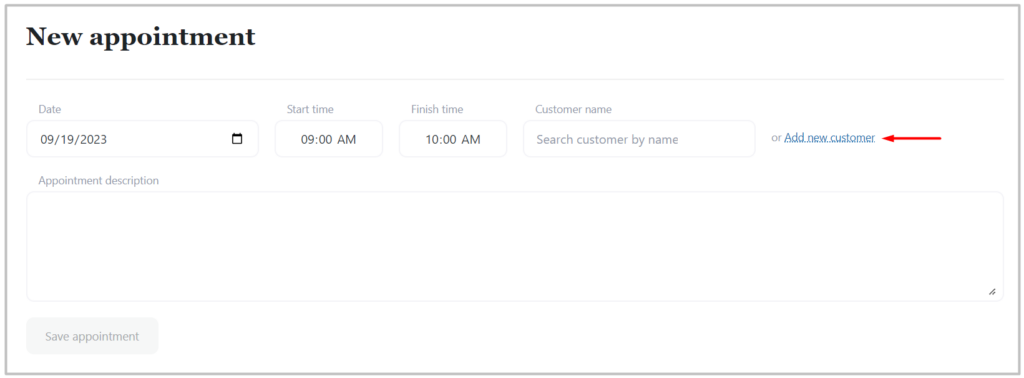
Upon clicking the “Add new customer” link, additional fields will appear for your custom, which automatically adds your new customer to the customer list.
After selecting appointment date, start time and end time will be filled with available and with free time period for that day according to your settings set in “Setttings” page.
After filling all required data for your appointment, click “Save appointment” button to add to appointment list or scheduled time period. Your appointment added through admin will bew saved with “confirmed” status.
Edit Appointment
Sometimes it happens that you need to make changes to an existing appointment. Maybe the customer needs to reschedule his appointment or you want to make any edits according to your schedule.
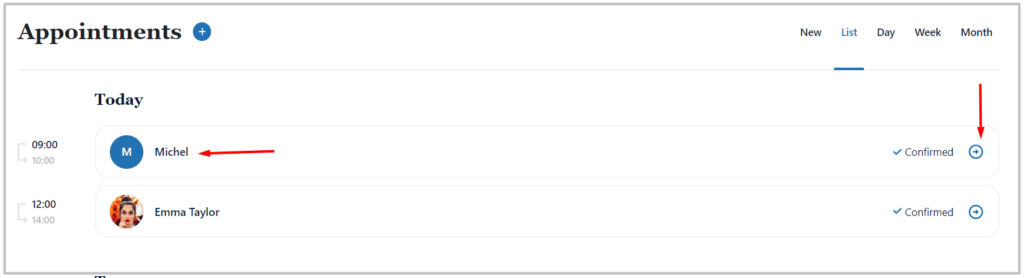
To edit an existing appointment, just click over any individual appointment’s name or arrow icon on the right of the appointment card and it will display edit page for appointment.

Editor page for appointment will look like this:
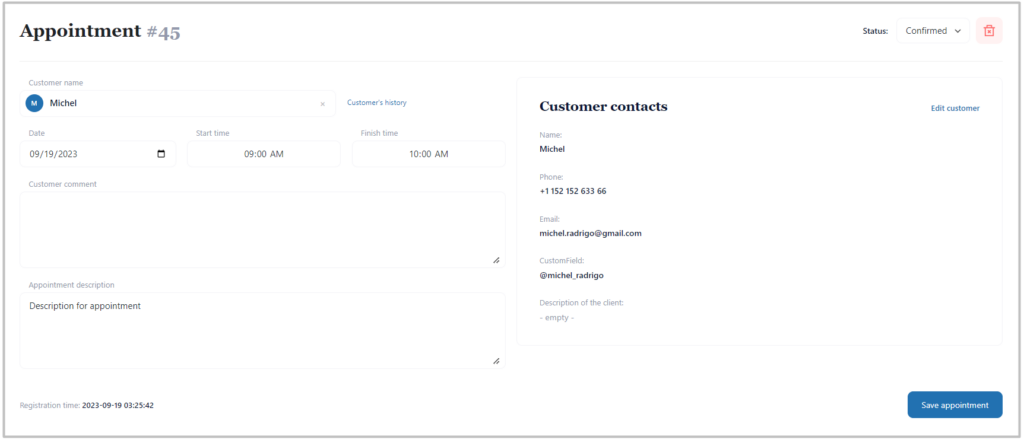
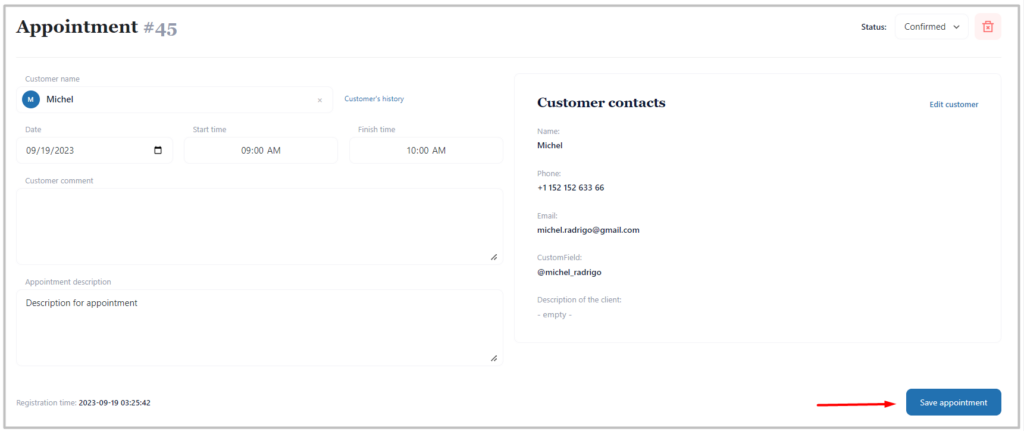
In the “Edit Appointment” page you have options to reschedule the appointment, change appointment booking status, change the customer, etc.
If you change the date, you may see that the selected time slot is not available. If this occurs, simply select a different time slot. After editting sand saving the appointment, it will notify the customers about the changes in the appointments by email as per your settings made in “Settings” page.
So, once you are done with all the changes, hit the “Save appointment” button to update the details.
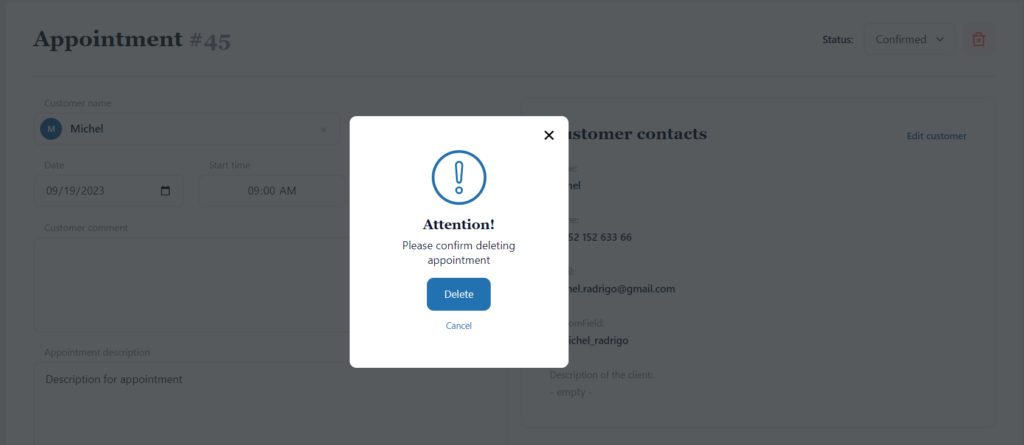
Delete Appointment
To delete a specific appointment, you need to go appointment editing page by clicking on the name or icon on the right side of the appointment card in Appointments page.
It will open an appointment editting page that has a “Delete” icon on the top right corner.
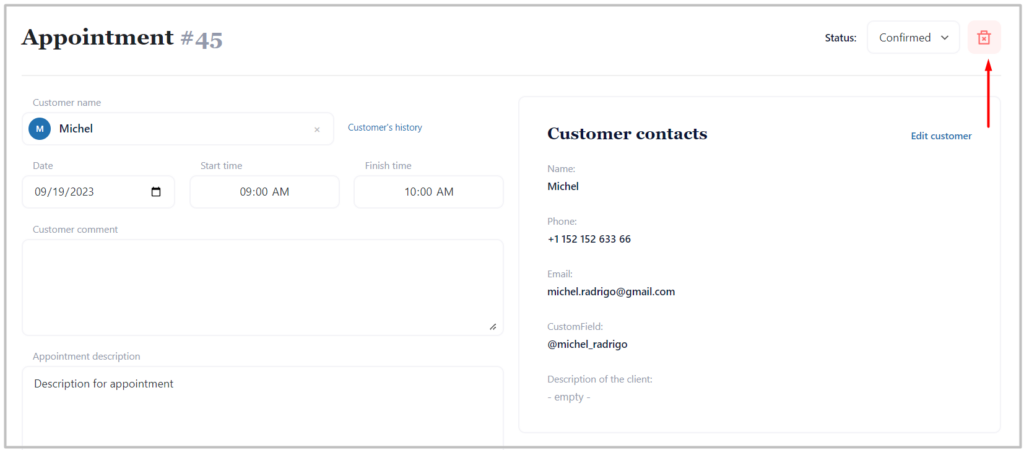
Click on that icon and it will ask for the confirmation to delete. Click on the “Delete” button from the confirmation box and it will delete that appointment right away.
Pending Appointments
You can see how many pending or new appointments there are in WordPress Admin besides Timecheck and Appointments menus. Whenever someone requests an appointment on your website, you will be able to see number of new or pending appointments directly in Timecheck menu in WordPress Admin.
As per your settings in the “Settings” page, you will automatically receive a notification when someone leaves a request for an appointment on the website.
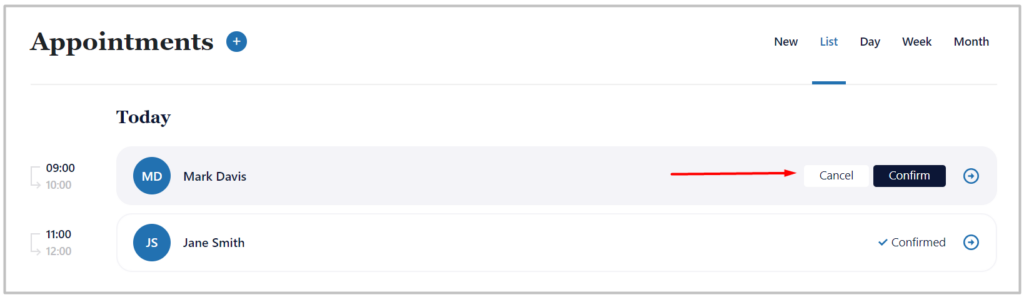
To see the list of the new or pending appointments, you need to navigate Timecheck > Appointments and on that page click on “New” tab on the top right corener of the page. Here, you can directly change appointment status to “Cancel” or “Confirm” it by clicking corresponding button.

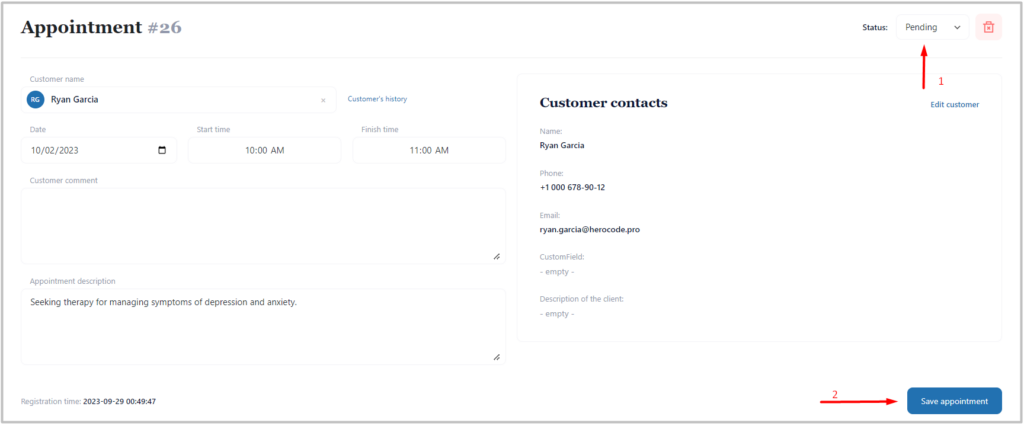
Another option to change the status of appointment to go to edit page of the appointment by clicking name or right arrow icon on the right side of the appointment card.

In the edit appointment page you will be able to find dropdown on the top right corener of the page to change status of appointment. After changing the status in edit page you have to click “Save appointment” button on the botom of the page.
Confirm Appointment
By default, all appointments added via WordPress Admin Panel have the status “confirmed”.
To confirm an appointment coming from frontend of your website, you need to navigate Timecheck > Appointments and on that page click on “New” tab ( to cancel newly added appointments) or “List” (where you will be able to find all your appointments), on the top right corener of the page. Here, you can directly change appointment status to “confirmed” by clicking “Confirm” button.

Another option to change the status of appointment is to go to edit page of the appointment by clicking name or right arrow icon on the right side of the appointment card.
In the edit page you will be able to find dropdown on the top right corener of the page to change status of appointment. After changing the status in editting page you have to click “Save appointment” button on the botom of the page.

Cancel Appointment
To cancel an appointment, you need to navigate Timecheck > Appointments and on that page click on “New” tab ( to cancel newly added appointments) or “List” (where you will be able to find all your appointments), on the top right corener of the page. Here, you can directly change appointment status to “Canceled” by clicking “Cancel” button.

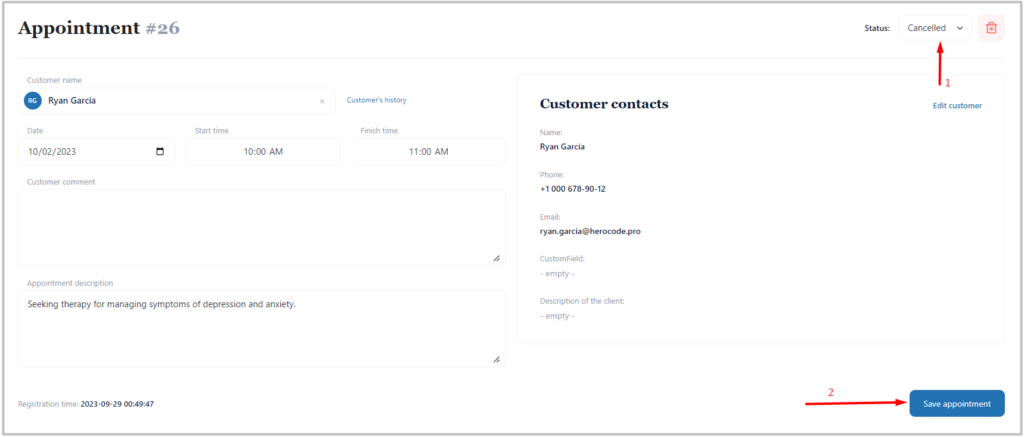
Another option to change the status of appointment is to go to edit page of the appointment by clicking name or right arrow icon on the right side of the appointment card.
In the edit page you will be able to find dropdown on the top right corner of the page to change status of appointment. After changing the status in edit page you have to click “Save appointment” button on the bottom of the page.
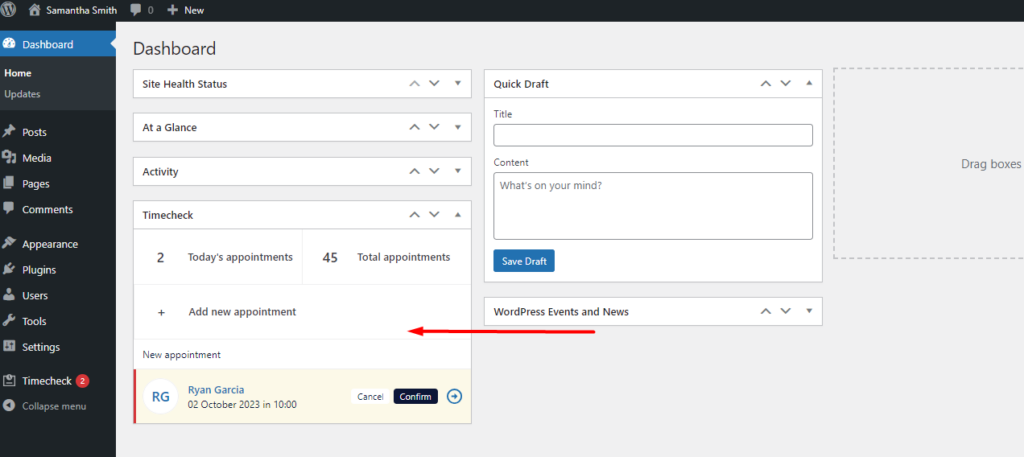
Dashboard
In the WordPress Admin Dashboard, there is a Timecheck box that shows the number of appointments for today, the total number of appointments, and the number of new appointments. You can also add new appointments by clicking “Add new appointment” and confirm or cancel pending appointment requests of your customers.